
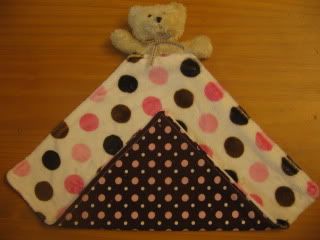
This project started as a baby shower gift for a girlfriend. I needed one in lieu of her actual gift -- which wasn't finished. Eying one of the far too many stuffed animals my children had, an idea struck me. Those stuffed animals would make wonderful upcycled animal lovies! I came up with this pattern and, because it's quick and simple, I have a feeling I will be making many more of these for friends and charity.
These instructions are for making a lovie that has animal parts in only one corner. It can be easily adapted though if you would like to have animal hands in the corners or a head in the middle of a side and hands and feed in the corners. Just repeat Step 3 #2 with each corner and animal part you want to use. And if you want a head on one side, just leave a section on that side open when stitching the blanket closed.
I would appreciate if you only used this for personal use and gifts but if you feel you must sell them, please consider donating some to a hospital or battered women's shelter or some other charity. Thank you.
Materials:
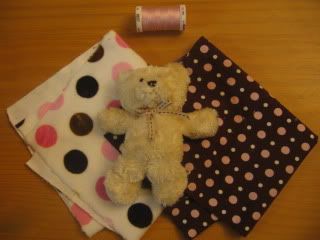
1 small stuffed animal
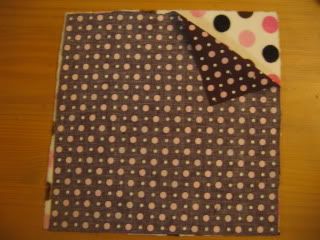
2 15x15" squares of fabric in matching or coordinating prints/solids (suggested fabrics: minky, flannel, woven cotton, chenille, satin)
sewing machine or sewing needle
coordinating or contrasting thread
scissors
Step 1: Cut-up the stuffed animal
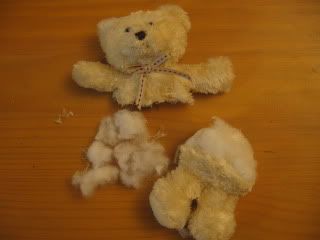
My kids had a hard time watching this one :lol:There are a couple different ways you can do this. If you want an animal lovie with the head and arms at the top then you would cut your animal along it's midsection. If you want an animal lovie with the head at the top and the hands/paws on the sides, then you would cut just the head off and then cut the two arms off. If you want an animal lovie with the head on one side and the hands on the top corners and feet on the bottom corners then you would cut off the head, arms, and feet.
Step 2: Baste Close
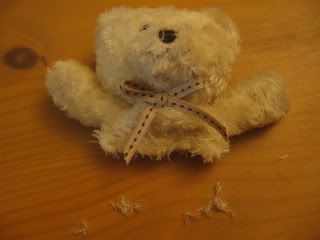
After removing the appendages you want to use, remove a bit of stuffing in the opening of each extremity and then baste the ends closed about 1/4 inch in from the cut edge.
Step 3: The Blanket
1. Place the blanket pieces together with right sides facing each other and pin together.
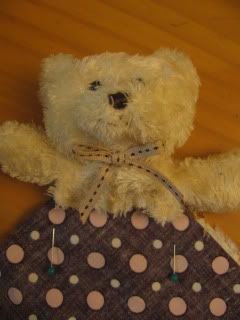
2. Decide which corner you want to place the head in, mark where the head lays and cut off the corner from mark to mark.
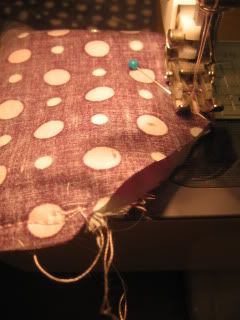
3. Sew the blanket together starting at one corner of the cut corner and working your way around to the other corner, making sure to not sew the cut corner closed.
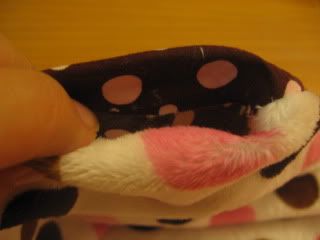
4. Turn the blanket right side out through the cut corner.
Step 4: Assembling the Pieces
5. Turn the raw edge inward and place the basted edge of the stuffed animal head into the opening. Pin closed.
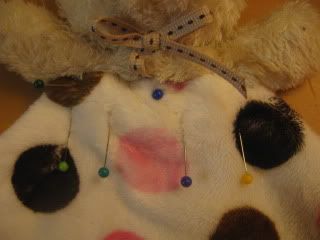
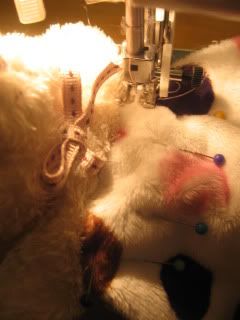
6. Carefully maneuver the animal head so you can sew the pinned edge closed and then continue to top stitch all the way around the blanket ending with sewing over the pinned edge one more time. Trim excess thread.
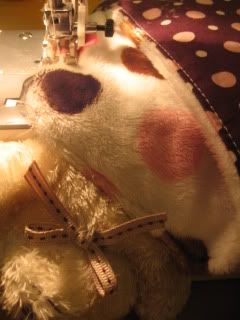
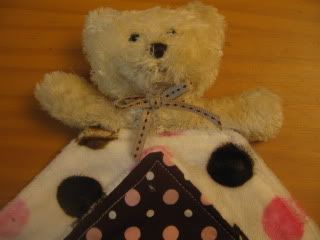
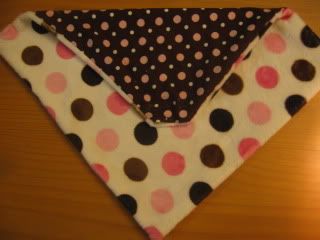
7. Ta-da! You have your own little animal lovie.


1 comment:
That is so cute! I may have to look into this for a friend who is due in April! Love it!
Post a Comment